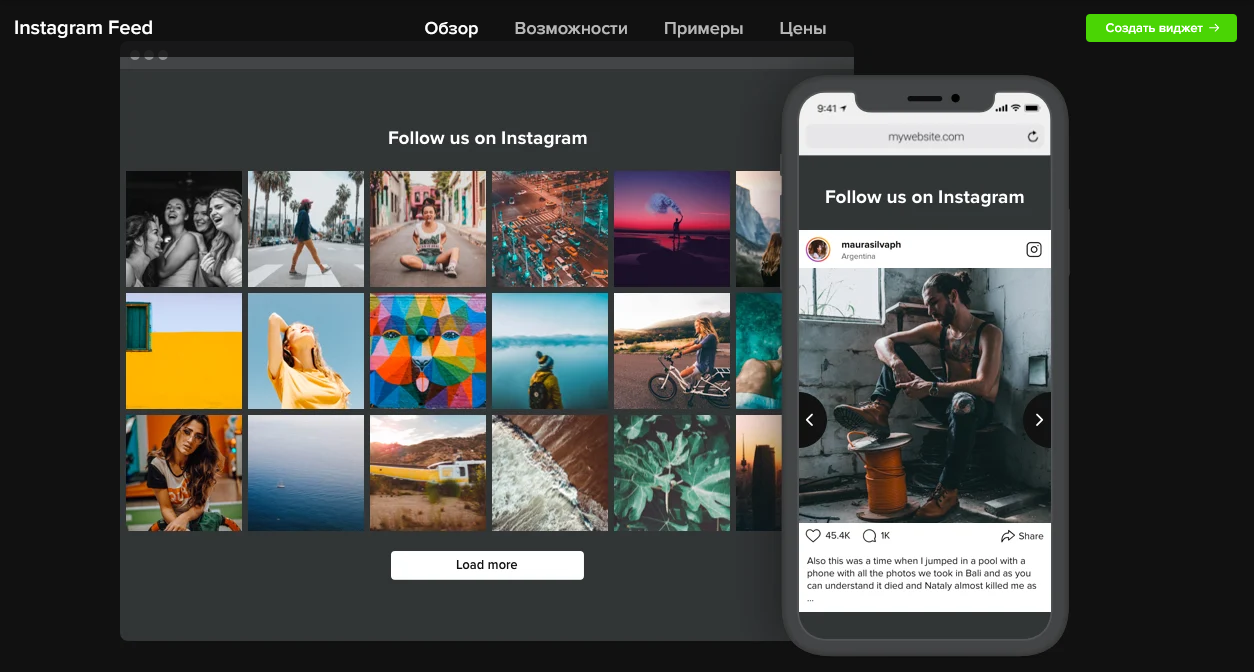
Instagram widget for Mobirise (Free Instagram Feed for Mobirise).

Free Instagram Feed for Mobirise
Many users of the website builder Mobirise may have noticed that the Instagram extension has been working incorrectly lately. For some, the user, the Instagram widget, stopped working altogether.
More attentive users may already have noticed that Mobirise has abandoned this Instagram Feed widget and removed it from newer versions of Mobirise. It remained only with those who installed it earlier. At the same time, the work of the widget did not return to normal.
Who's guilty?
Few people want to understand that the reason for abandoning this Mobirise widget was changes in Instagram itself, which tightened the screws for third-party developers.
What's changed on Instagram:
- Instagram actively discourages parsing of its website
- Provides full access to the Basic Display API and Graph API only for business tasks
- June 29, 2020 API Endpoint support and not interested in streaming content to other platforms
It was this situation that led to the fact that many free Instagram widgets that were available, including Instagram Feed Mobirise, stopped working.
Thus, creating and maintaining an Instagram Feed widget for free is a waste of time and money. As for paid solutions, they exist and work.
Based on the heated discussion of this issue on the official Mobirise forum related to the "permanent breakdowns" of Instagram Feed Mobirise, the developers decided to abandon this widget and let users use third-party solutions themselves.
On May 20, 2021, Mobirise ditched the Instagram Feed extension for now.Alternatively, you can use the available free Elfsight plan .
These extensions are easily customizable and easily installed on the site. In today's post, we will briefly find out:
- How to register with the Elfsight service;
- How to set up an Instagram widget for a website;
- How to install an Instagram widget on a website in the Mobirise builder;
- Free and paid plan for using Instagram widgets at Elfsight.
Separately, it is worth noting that these solutions are relevant both for HTML sites and for sites on the CMS.
Registration on the Elfsight website.
We open the official Elfsight website: https://elfsight.com/ru/
In order to use the Elfsight widgets on your Mobirise website, you must register for free. Without registration, you will not be able to receive the widget code, which will then need to be placed on your website. To register, click on the "Free registration" button :
In the window that opens, fill in the data:
After registering and confirming the mail, go to your personal account (if there was no automatic redirection). To do this, on the main page https://elfsight.com/ru/ , click the "Login" button :
Choosing an Instagram widget for a website.
After entering your personal account or after automatic redirection during registration, go to the section "Applications" (1.). In the "Widgets" section (2.), you can select any widget that you want to use:
In our case, we need to select the feedback form widget. To do this, select the "Social" tab (1.) and select the "Instagram Feed" or "Instagram Widget" widget (2.):
What's the difference between Instagram Feed and Instagram Widget? To answer this question, let's look at the settings for each widget separately.
Setting up the Instagram Feed widget in Elfsight.
Hover the mouse over the Instagram Feed widget in the Apps section:
When you hover over this widget with the mouse, the message "Create widget" will appear. Click on it:
A new window "Start by choosing a template" will open (1.). We select (2.) the template that you like best. You can immediately see how the (3.) Instagram widget will look on different devices:
After choosing a template, click "Continue with this template":
A tab with widget settings will open. Please note right away that to customize the display of the content of your Instagram account in this widget, you need to log in through the application on the Elfsight website.
In the "Content" tab (1.), select the type of your account (2.) Instagram and go through the authorization (3.):
Only in this way, the Instagram Feed widget will be able to correctly display your data from your account and display it in the widget.
The "Instagram Widget" widget works in a different way and you just need to specify your Instagram login in the widget settings. For more on this, see below. That being said, the Instagram Feed widget works using the Instagram API, which makes it a more stable solution than the Instagram Widget, which simply parses your Instagram account data. In any case, you can try two widgets and choose the one that best suits your needs.
In the rest of the tabs, you can customize the look, color, language. After the settings, click "Apply" (1.) and "Save" (2.):
After saving, you will be prompted to select a tariff plan. You can choose the one that suits you. There is also a free plan.
After choosing a service plan, a new page will appear with a window in which the widget code will be:
This code must be copied and placed on your website. After placing the widget on the site, press the button "I installed the code".
For information on how to place the Instagram widget in the Mobirise website builder, see below, after setting up the Instagram Widget.
Configuring the Instagram Widget in Elfsight.
Hover the mouse over the Instagram Widget in the Applications section:
When you hover over this widget with the mouse, the message "Create widget" will appear. Click on it:
A new window "Start by choosing a template" will open (1.). We select (2.) the template that you like best. You can immediately see how the (3.) Instagram widget will look on different devices. After choosing a template, click "Continue with this template":
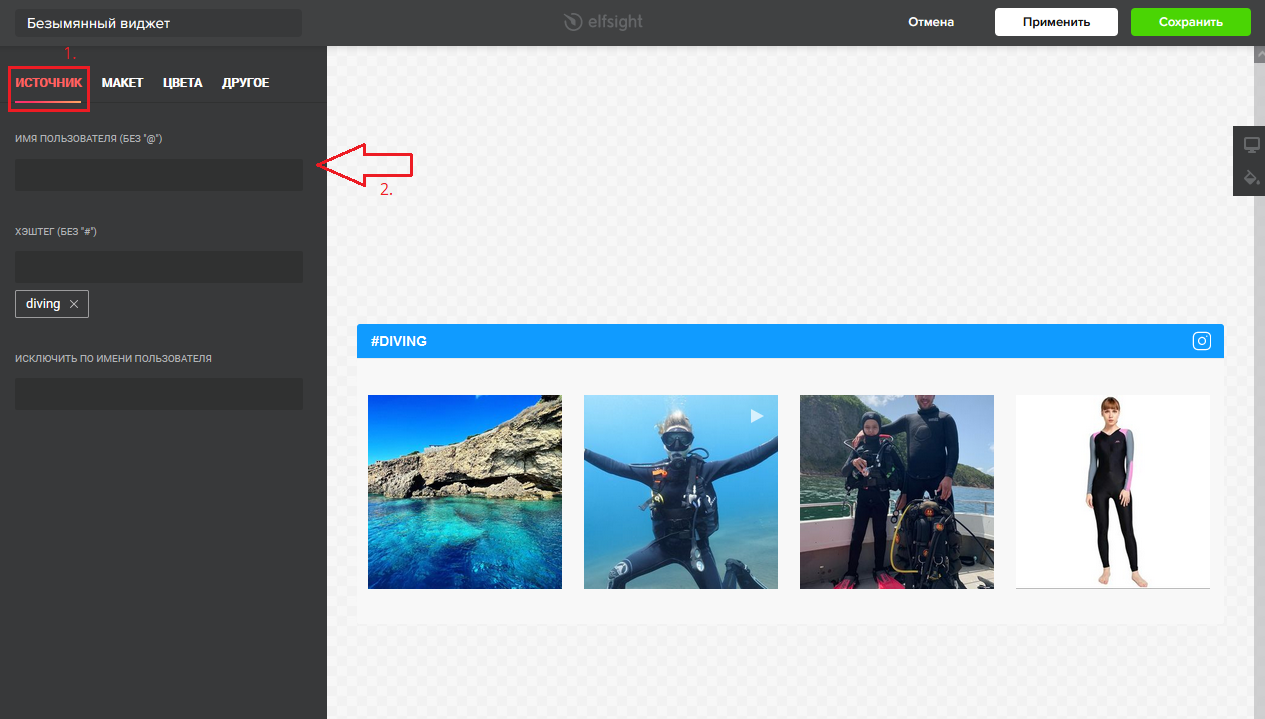
A tab with widget settings will open. As mentioned above, unlike the Instagram Feed widget, in this widget we do not need authorization through the application on the Elfsight website to customize the display of the content of our Instagram account. In the "Source" settings tab (1.), indicate your Instagram login (2.):
In the rest of the tabs, you can customize the look, color, language, set your own hashtags, exclude usernames. After the settings, click "Apply" (1.) and "Save" (2.):
If you are setting up this Instagram widget for the first time, you will be prompted to choose a tariff plan after saving. You can choose the one that suits you. There is also a free plan.
If before that, you have already configured the Instagram widget, this step will be skipped and a new page will immediately appear with a window in which the widget code will be:
This code must be copied and placed on your website. After placing the widget on the site, press the button "I installed the code".
Installing the Elfsight widget on the site in the Mobirise program.
The following way to install Instagram widget (“Instagram Feed” and “Instagram Widget”) is a one-stop solution for Mobirise website builder. You can use this method to connect any Elfsight widget. In one of the notes , we connected in this way a feedback widget for Mobirise.
Now, we can place this code on our website. This code can be placed already on a ready-made site, using the Notepad ++ code editor or similar for this. Or, you can immediately place the widget in the website builder. To do this, you can use an empty HTML block or add code to any block. In any case, we need a code editor. If you don't have the paid version of Mobirise, you can use an alternative editor that is free of charge.
In my example below, I will use a ready-made block of a standard feedback form and a free code editor. For these purposes, you can use any ready-made block in Mobirise. To do this, in the free theme Mobirise 5, select the block with the contact form:
After adding the block, open it in the code editor:
In the code editor, delete all the content of the HTML block and CSS styles:
In the HTML block (1.), add the copied widget code that we previously created and copied. We now need to remove the script code (2.).
As a result, we should have something like this:
Don't forget to save your changes.
Note.
If you have the paid version of Mobirise, you can use a separate blank HTML block to add code to your site. If you are using a free code editor, it is possible to use an empty HTML block as well.
The principle of adding code to these blocks is the same as described above.
Now, we need to add a script to the body tag. For this, we need a paid code editor or a free ready-made solution . In my example, I will use a free extension. To do this, go to the page settings and select the desired page. Now, having opened the settings of the selected page, add the widget code. At the same time, we delete all unnecessary things, leaving only the script itself. It should look like this:
It should be noted right away that the script for the Instagram widget (“Instagram Feed” and “Instagram Widget”) will most likely not be displayed in the Mobirise program itself. To see the result, use the preview.
If you don't see the result in the browser, clear the cache. Before making any edits in the code editor, back up the project
Rates for Instagram widgets at Elfsight.
Additionally, it is worth remembering that on the free plan, 200 widget views are available per month. If your widget is viewed more than 200 times per month, it will be blocked and you will be offered to purchase a paid plan.


Комментарии